
Affiliate disclosure: As an Amazon Associate I earn from qualifying purchases. This article contains affiliate links.
Practical guide • Updated October 11, 2026
A stream can look inviting while telling you very little about whether its water is suitable to drink. A filter can look ready while hiding damage, missing parts or an unsuitable treatment claim. The useful starting point for camping water treatment is therefore a plan, not just a product clipped to your backpack.
Your plan should explain where water will come from, how you will treat it, how you will keep treated water separate and what you will do if the first method fails. This Outdoor Wild Living guide focuses on that practical sequence. It combines limited official treatment guidance with original planning suggestions so you can prepare for an ordinary camping or hiking trip without treating equipment as a guarantee.
Start with the route and available sources
Read current information from the campground or land manager. Find out whether a listed tap is operating and whether the water is described as potable. A map symbol does not establish current availability. Seasonal shutdowns, maintenance and access changes can affect a source that was usable on a previous visit.
For a trail trip, identify the stretches between possible water sources and the points where you could turn around. Do not assume every stream shown on a map will be flowing. Conditions change, and a convenient source can be inaccessible or unsuitable when you arrive.
Write a simple source plan before packing. It might say: carry drinking water from home, refill at a confirmed potable campground tap and keep an appropriate treatment method for an unplanned delay. That is clearer than carrying a filter without knowing when you expect to use it or what source you would choose.
Understand what treatment can and cannot address
The CDC’s hiking and camping water guidance explains that clear-looking water can still contain germs. Its guidance favors boiling when possible or using an appropriate filter followed by disinfection. Ordinary portable treatment should not be assumed to make water contaminated with harmful chemicals safe.
CDC specifies a rolling boil for one minute, or three minutes above 6,500 feet. Follow the official guidance and equipment instructions for the situation. Do not substitute a quick warming of water for the specified treatment. For chemical methods, follow the product’s dose, contact time and limitations exactly rather than guessing.
Those details establish an important boundary: different methods address different concerns. The rest of your plan must match the source, equipment and actual conditions. If the source may be affected by chemical contamination or an official warning, choose another safe source rather than assuming an extra pass through a filter fixes it.
Read the actual product claims
Before buying a filter or purifier, read what the manufacturer says it removes and what conditions it requires. Similar-looking devices can have different capabilities. The words on the package matter more than an attractive photograph or a general claim that the product is made for survival.
Check the required accessories. A system may need a compatible bottle, bag, hose or connector. Make sure those parts are included and that you can operate the complete setup. A filter that works only with a container you forgot to pack is not a functioning treatment system on the trail.
Read care instructions, including storage, cleaning and temperature limitations. Some equipment can be compromised by handling or conditions that are not obvious from its appearance. Keep the model information with your trip notes so you can check the manufacturer’s guidance instead of relying on memory from an old review.
Practice the whole process at home
Set up the equipment before the trip. Assemble connectors, identify inlet and outlet sides and learn the normal sequence using water and conditions appropriate for practice. The goal is to understand the procedure, not to test unknown water as an experiment.
Time how long the setup and treatment take in an ordinary controlled trial. That helps you plan breaks on the trail. A system that seems quick in a demonstration can feel slower when everyone is thirsty, the light is fading and a small part is difficult to handle.
Pack the system the same way you expect to carry it. Confirm that wet components can be managed according to the instructions and that clean containers stay protected. If you discover the arrangement is awkward, change it at home. Learning during a dry run is easier than improvising beside a stream.
Keep untreated and treated water separate
Use a clear distinction between collection equipment and drinking equipment. A label or different container color can help the whole group understand which is which. Do not rely on a vague rule that only the most experienced person remembers.
Follow the manufacturer’s instructions for preventing cross-contamination during treatment and handling. Pay attention to container openings, caps and surfaces that could contact untreated water. The finished water needs a clean destination, not simply a bottle that happens to be empty.
Explain the arrangement to companions before the first refill. Children and new campers should not have to guess which bottle is ready to drink. A brief conversation can prevent someone from using the collection container because it is the nearest available option.
Plan water breaks as part of the day
Think about when the group will stop, where equipment can be handled safely and how long the process could take. A treatment stop is also a chance to check the route and conditions. Do not leave every refill until your containers are empty and you feel pressured to accept the first source you see.
Match the route to the people and the conditions. Required water varies with activity, weather and individual needs. Avoid presenting one fixed quantity as enough for every person on every hike. Plan conservatively and get appropriate guidance for special requirements rather than assuming a generic packing list covers them.
Maintain a sensible reserve for delays. A wrong turn, slow group member or unavailable tap can extend the day. The reserve is part of the route plan, not spare weight to discard automatically once the trip starts feeling comfortable.
Choose a backup that is genuinely usable
A backup should remain useful if the primary system has the particular failure you are worried about. Another connector for the same broken device may solve a lost-part problem. It does not solve every equipment failure. Think through the scenario before choosing what to carry.
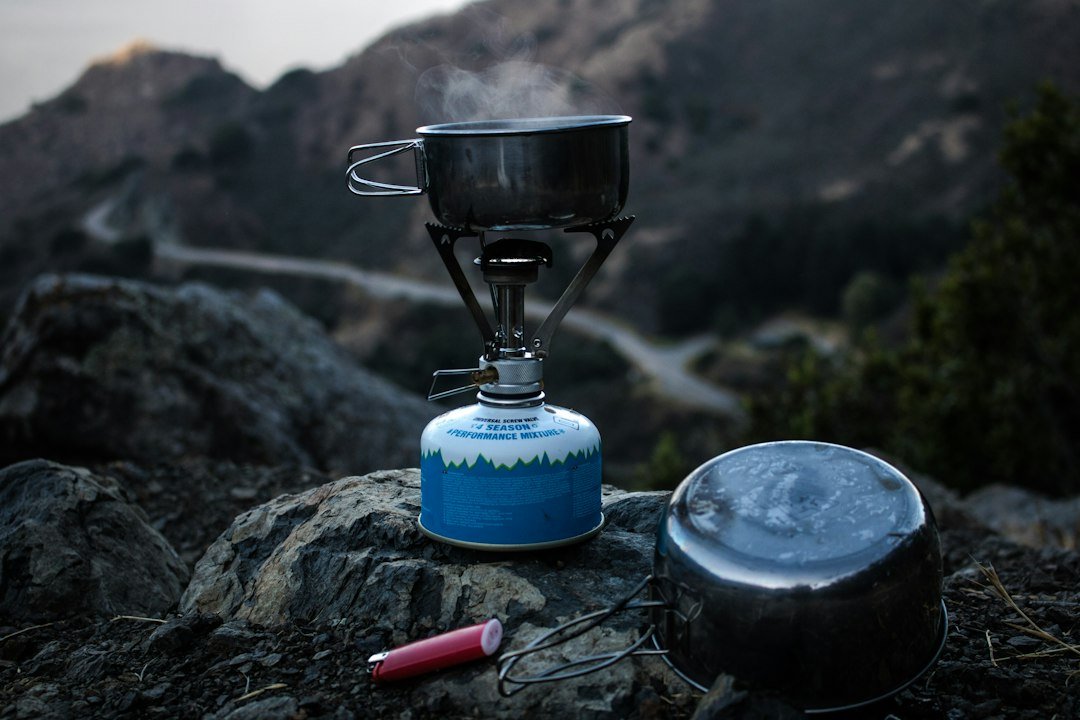
If boiling is your backup, account for suitable equipment, fuel, safe operation and time to cool the water. If an appropriate chemical treatment is part of the plan, check its expiration, instructions and treatment limitations. Neither option works well when you have only half the required supplies.
Keep the backup accessible and identifiable. A packet lost at the bottom of a mixed emergency pouch is easy to overlook. Make a short card with the relevant product instructions if the original packaging can be retained safely and legibly. Do not invent a homemade dosage chart.
Establish a decision point for an unavailable source
Decide in advance what would make you shorten the trip or turn around. For example, a key source may be dry while the next one is too uncertain to reach with the remaining drinking water. A preplanned decision reduces the temptation to continue because you have already walked a long way.
Communicate that decision to the group. Nobody should learn at the last moment that the route depended on one unverified refill. If the plan changes, reassess the remaining distance, conditions and available resources together.
Keep emergency options realistic. A mobile phone may not have service, and a parked vehicle is useful only if you can return to it safely. Treatment equipment should complement a conservative trip plan, not justify extending a route beyond what the group can handle.
Make camp refills straightforward
At camp, designate a place for clean drinking containers and a separate place for collection equipment. Follow site rules and maintain an appropriate setup for the environment. Avoid leaving small parts where they can be lost in leaves or sand.
Include cooking and cleanup in your water planning. Drinking is not the only use you may need to account for, and different activities can have different requirements. Review official guidance for hygiene and food preparation instead of assuming that water suitable for one purpose is automatically suitable for another.
At a developed campground, confirm which taps or facilities provide potable water. Signs and current staff information take precedence over what you remember from last year. Refill before a scheduled shutdown or departure when that fits the plan, and keep containers secured for travel.
Give the group a simple shared plan
Before leaving, ask each companion to explain where the next refill is expected and which container holds drinking water. This brief check can reveal different assumptions before they become a problem. One person may believe a campground tap is confirmed while another only saw an old map marker.
Keep the explanation short enough to remember: starting supply, expected refill, treatment method and the point where the route changes if water is unavailable. Assign equipment deliberately so the whole system does not accidentally end up in the pack of someone taking a different trail. Clear coordination makes the preparation useful to everyone.
Maintain equipment after the trip
Clean, dry and store the system according to the manufacturer’s instructions. Inspect for missing parts or damage while the trip is still fresh in your mind. Put replacement needs on a list before the equipment disappears into seasonal storage.
Record any difficulty you encountered: a slow process, an awkward connector, a source that was unavailable or a container that leaked. These notes help improve the next plan. Do not describe the system as proven safe simply because nobody reported feeling ill after one trip.
Camping water treatment works best as a sequence you can explain clearly. Know the source, understand the method, protect treated water and retain a usable fallback. Explore more practical trip preparation at Outdoor Wild Living, and check current land-manager information and treatment instructions every time the route or equipment changes.
0 Comments