
Practical guide • Updated October 11, 2026
The trip ends when you reach home, but the equipment still has work waiting. A damp tent, a muddy pack and a stove with a missing component can quietly become next month’s departure problems if you seal everything into storage and forget it. A short, organized reset helps you avoid discovering those issues at the next campsite.
Camping gear care after a trip does not require a universal cleaning recipe. Different fabrics, coatings, equipment and batteries have different requirements. The useful routine is to identify each item, follow its instructions, dry and inspect it appropriately, then record what needs attention. This guide focuses on building that routine so maintenance becomes a manageable part of the trip rather than an occasional overwhelming cleanup.

Make a landing area before you unpack
Choose a suitable place where equipment can be sorted without blocking exits, damaging finishes or creating an unsafe walking path. Protect the surface as appropriate for the items you are handling. Keep the setup manageable for the amount of gear you actually own.
Sort equipment into a few practical groups: items ready for ordinary care, items needing drying, items needing inspection and items requiring a repair decision. Keep food and waste separate. Do not dump everything into one pile where a sharp piece of equipment can contact delicate fabric.
Give the reset a clear endpoint. You want gear stored according to its requirements and a written list of unresolved issues. You do not need to complete every specialist repair immediately. A controlled process lets you identify a problem promptly without attempting an unfamiliar fix while you are tired from travel.
Find the instructions for each major item
Locate the model and manufacturer’s care guidance for the tent, sleeping system, pack, stove and treatment equipment. Save links or copies in a simple gear folder. Similar-looking items can use different materials, so advice for one model should not automatically become a rule for all of them.
NEMO’s tent-care guidance illustrates why those details matter: it specifies cleaning methods, complete drying and suitable long-term storage for its equipment. Follow the instructions for your actual product, including any restrictions on washing, heat and cleaning agents.
Read before purchasing a cleaner or repair material. Compatibility matters more than a general claim that a product is for outdoor gear. Keep the relevant packaging and instructions with the supplies. If the manufacturer provides a support contact for an unclear issue, use it instead of guessing.
Deal with food and waste first
Remove remaining food and dispose of it or store it according to the applicable handling guidance. Empty trash containers and check pockets for small wrappers. Separate kitchen equipment that needs cleaning from equipment that is already clean.
Look in the less obvious places: side pockets, the bottom of a cooler and the pouch that held snacks during a hike. An overlooked item can create a mess that spreads to otherwise clean equipment. Make the check deliberate rather than relying on a quick glance into the largest compartment.
Clean and dry food-related equipment using its appropriate instructions. Do not place freshly cleaned utensils back into a dirty storage bin. Reset the container as part of the process so your next kitchen kit begins in a usable condition.
Give wet equipment appropriate drying time
Follow the manufacturer’s directions for drying and storage. Do not assume a surface that feels dry proves every fold, seam or accessory is ready to be packed away. Inspect the components that were exposed to moisture and keep them organized while drying.
Choose a drying arrangement suitable for the product and location. Avoid improvising high heat or exposing materials to conditions their instructions prohibit. A faster method is not useful if it damages the equipment. If space is limited, plan a sequence rather than crowding all the items into one unsuitable area.
Label the items still in progress so nobody puts them away early. A simple note such as “tent drying, check before storage” can prevent a well-meaning household member from undoing the process. Keep the instructions with the item if a particular storage arrangement needs to be maintained.
Inspect the tent as a complete set
Lay out or assemble the tent in a suitable way according to its instructions. Check that the body, fly, poles, stakes and required accessories are present. A fabric bag that contains most of the equipment is not necessarily a complete shelter system.
Record damage without immediately applying a general-purpose patch. Note the location, material and size of the issue, and photograph it clearly. The appropriate repair depends on the product. Ask the manufacturer about compatibility or professional service when the damage exceeds the guidance you can follow confidently.
Keep damaged or missing parts on the repair list. If the tent should not be relied on until the issue is resolved, label that status visibly. Do not let a storage sack conceal the fact that the equipment needs attention before its next trip.

Check the sleeping system separately
Use the specific care instructions for the bag, quilt, pad and accessories. They may have different cleaning and storage requirements even though you pack them together for travel. Follow those differences rather than washing or storing the whole group in one convenient way.
Inspect valves, closures, straps and visible surfaces as appropriate. Record any problem that appeared during the trip, such as a pad that lost support or a zipper that behaved differently. A brief note now is easier than trying to recall the details when contacting support weeks later.
Retain repair materials in usable condition according to their instructions. Replace supplies used during the trip and keep the correct items with the relevant equipment. A generic repair pouch should not make it difficult to identify which material is suitable for which product.
Reset packs and small accessories
Empty every compartment before cleaning or storage. Check for loose items that do not belong inside the pack long-term. Keep the pack’s model-specific cleaning requirements in view, including restrictions on washing methods and materials.
Inspect buckles, straps and closures while the pack is empty. Identify what needs repair or replacement, and avoid relying on an improvised modification without appropriate guidance. A carrying system matters most when it is loaded, so a defect that seems minor on the shelf can deserve attention before another route.
Gather small accessories into a labeled kit after they are ready for storage. Confirm that the light, navigation supplies and other items are complete. Follow battery and electronics instructions for storage. Do not assume that a device packed away while working will be ready months later without a check.
Treat stove and fuel care as its own task
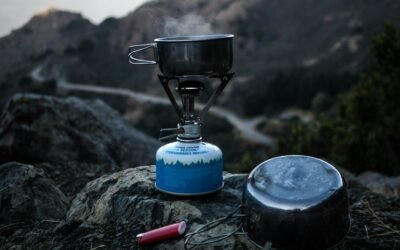
Follow the instructions for shutdown, cleaning, inspection and storage of the exact stove and fuel system. Work only in a suitable location and do not modify connections or components. If you noticed unusual operation, document it and seek the manufacturer’s guidance before further use.
Keep fuel according to its requirements, separately from any unsuitable storage arrangement. A general camping bin is not automatically an appropriate place for every material. Read the label and local requirements rather than choosing a location solely because it is convenient.
Confirm that the cooking system includes its required parts. A missing connector or damaged component belongs on the repair list immediately. Mark questionable equipment clearly so it cannot be mistaken for the ready-to-pack group during a rushed departure.
Reset water-treatment equipment deliberately
Use the manufacturer’s procedure for cleaning, drying and storage. Different treatment products can require different methods. Do not improvise chemical concentrations or assume one maintenance routine applies to every filter, purifier and container.
Record any event that may have affected the equipment, such as damage or exposure outside its specified conditions. Ask the manufacturer how to assess it. An intact appearance does not necessarily resolve a concern about internal components or treatment performance.
Check that the system is complete and that backup supplies remain usable. Retain instructions and replace expired or depleted items as needed. The next trip’s water plan should begin with equipment whose status you understand rather than a device pulled from a sealed pouch on the way out.
Make the repair list specific
For each issue, write the item, model, observed problem and next step. “Tent pole segment bent; contact manufacturer with photo” is actionable. “Fix camping stuff” is not. Add the date and any relevant trip conditions without turning an observation into an unsupported diagnosis.
Choose whether to repair, seek service, replace or retire the item based on appropriate guidance. Keep unresolved equipment separate from the ready group. That protects the next trip from an assumption that every stored item has already passed inspection.
Set a practical time to complete the required action before another trip. The deadline should leave room for replacement parts or service. Ordering a component the night before departure can force an avoidable change to the plan.
Store by status as well as by category
Use suitable storage conditions for each product. Label equipment ready for use and equipment awaiting a decision. Keep manuals, model information and purchase records accessible without attaching something that damages the product.
Leave room to retrieve items safely. Heavy or awkward equipment should not require an unstable climbing arrangement. Protect delicate gear from sharp accessories and from materials incompatible with its storage requirements. A neatly packed shelf is useful only when the equipment remains suitable to use.
Before the next trip, review the notes and check current conditions again. The post-trip reset prepares your gear; it does not replace a departure check. Explore more practical camping preparation at Outdoor Wild Living and make care, inspection and clear equipment status part of every outing.


0 Comments